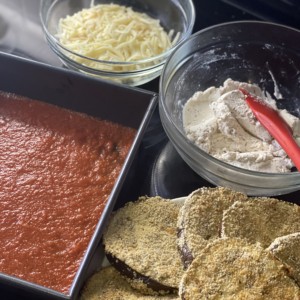
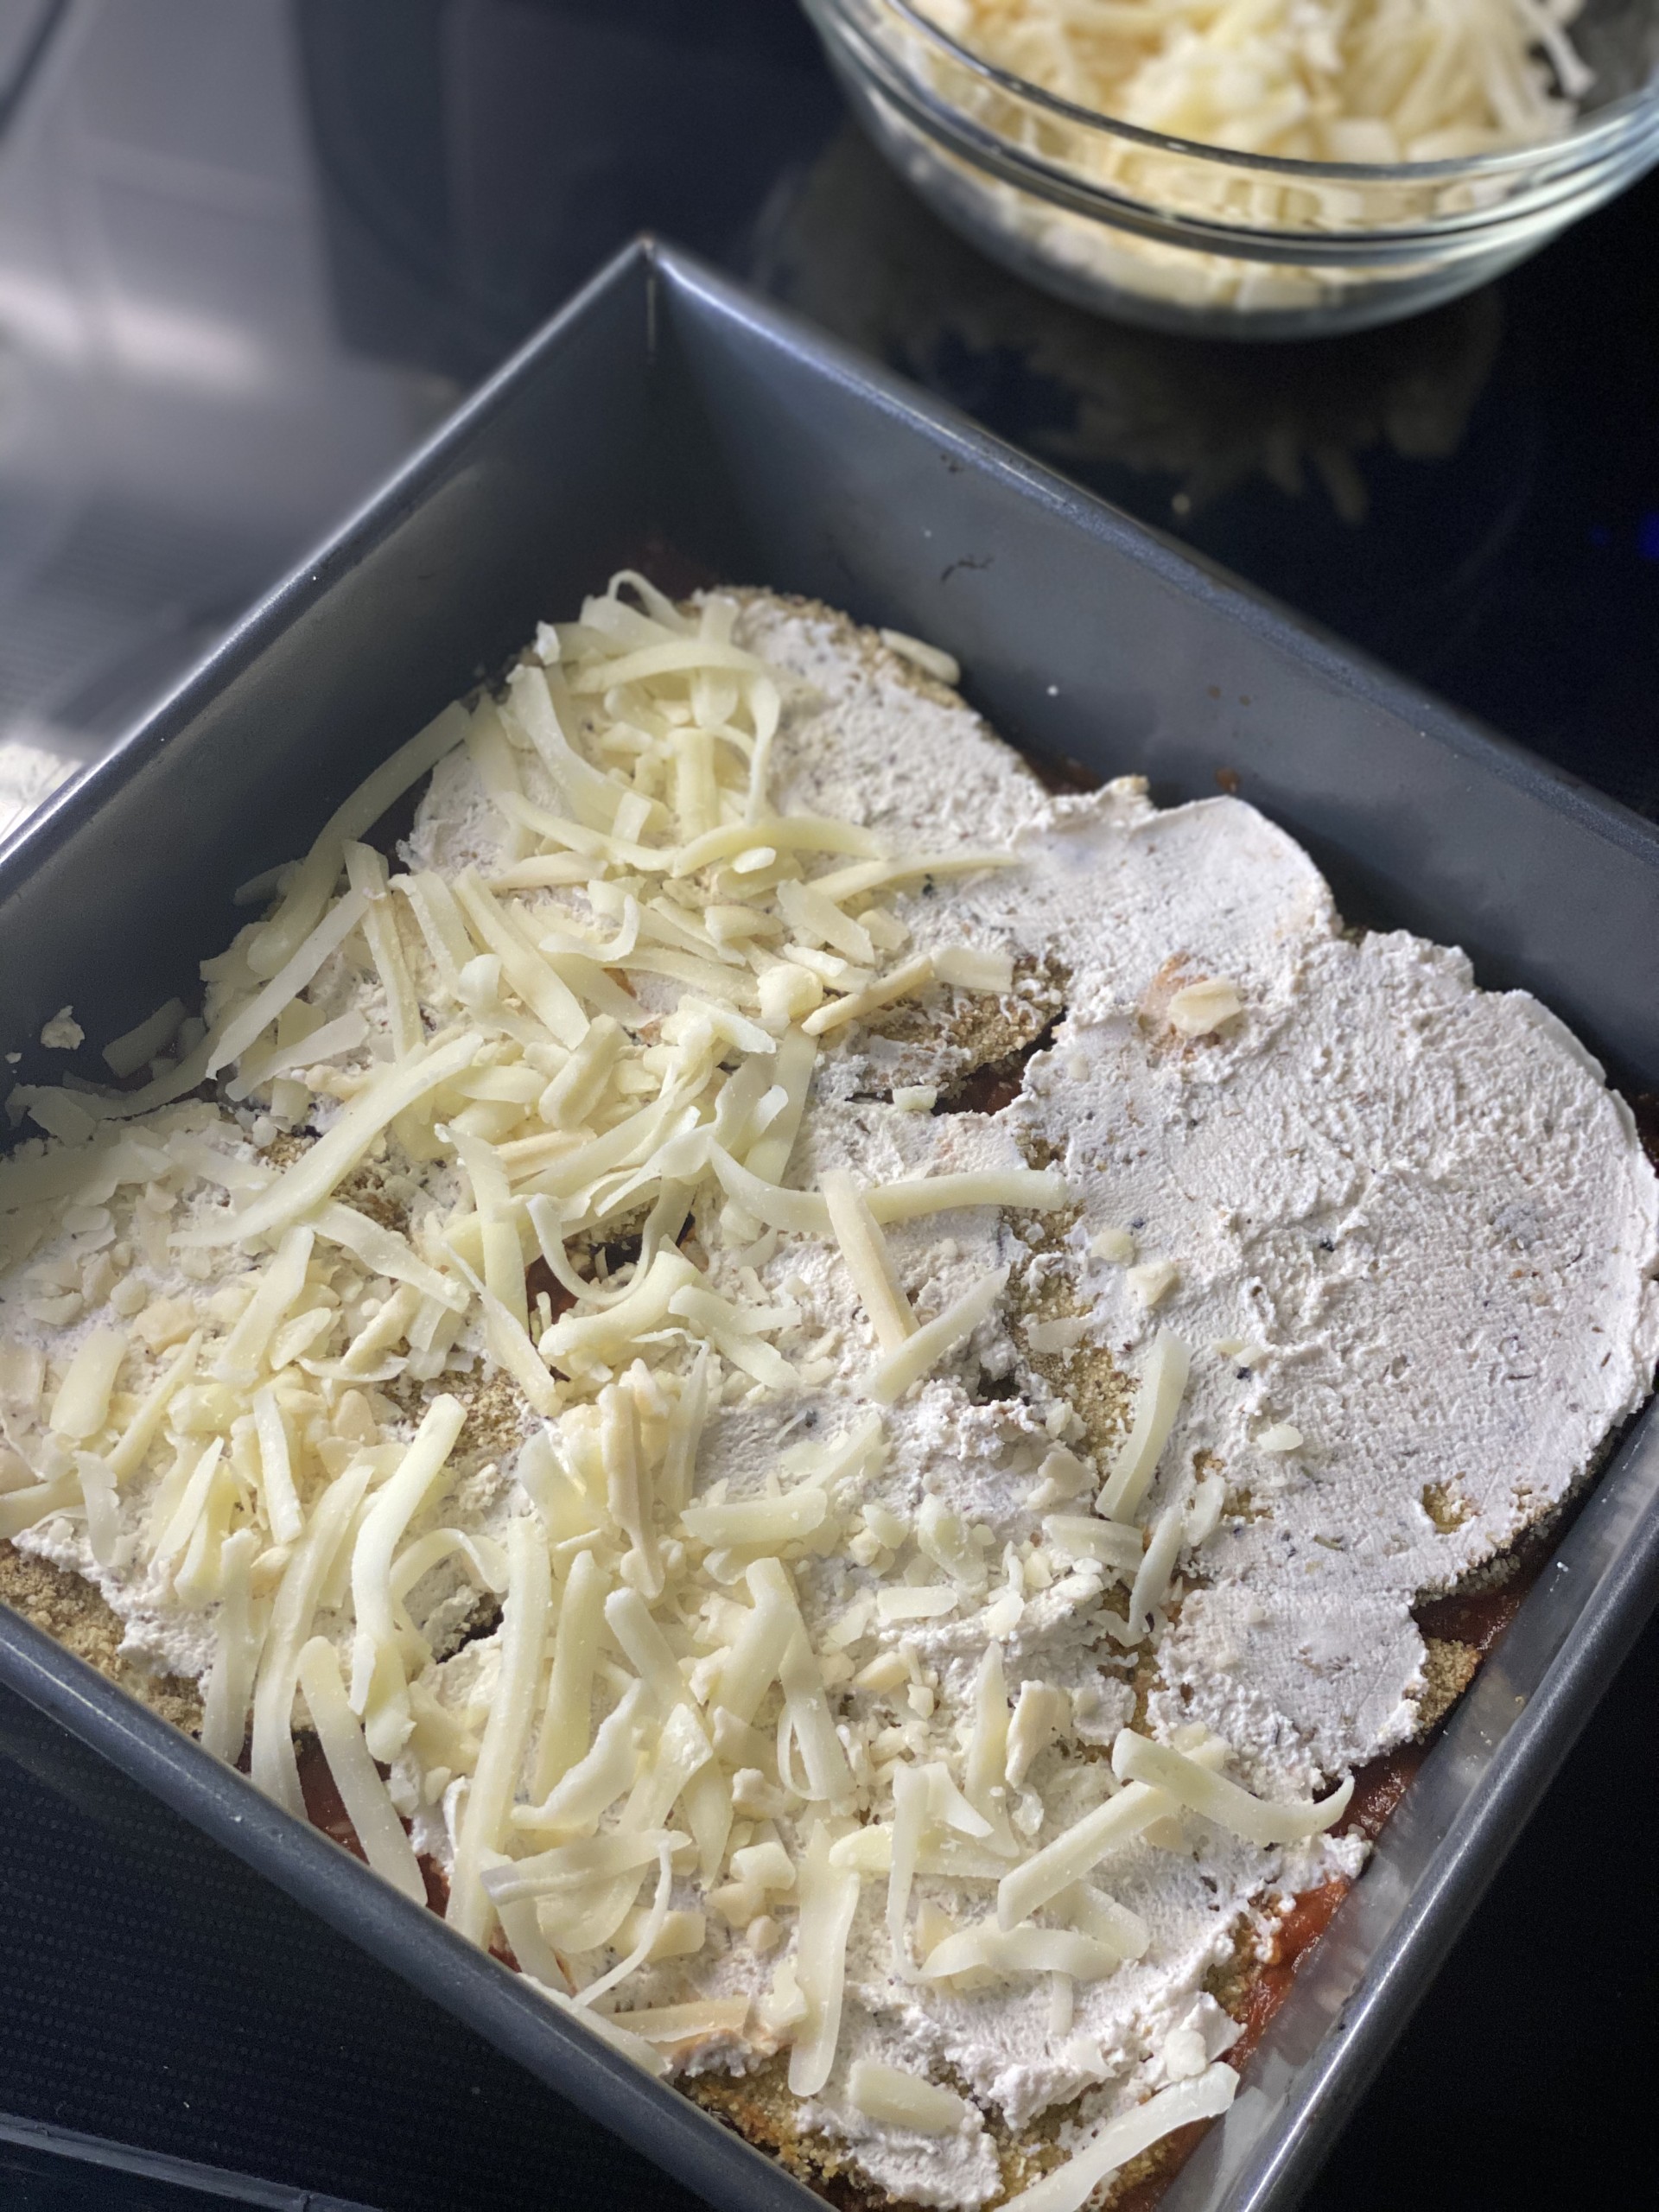
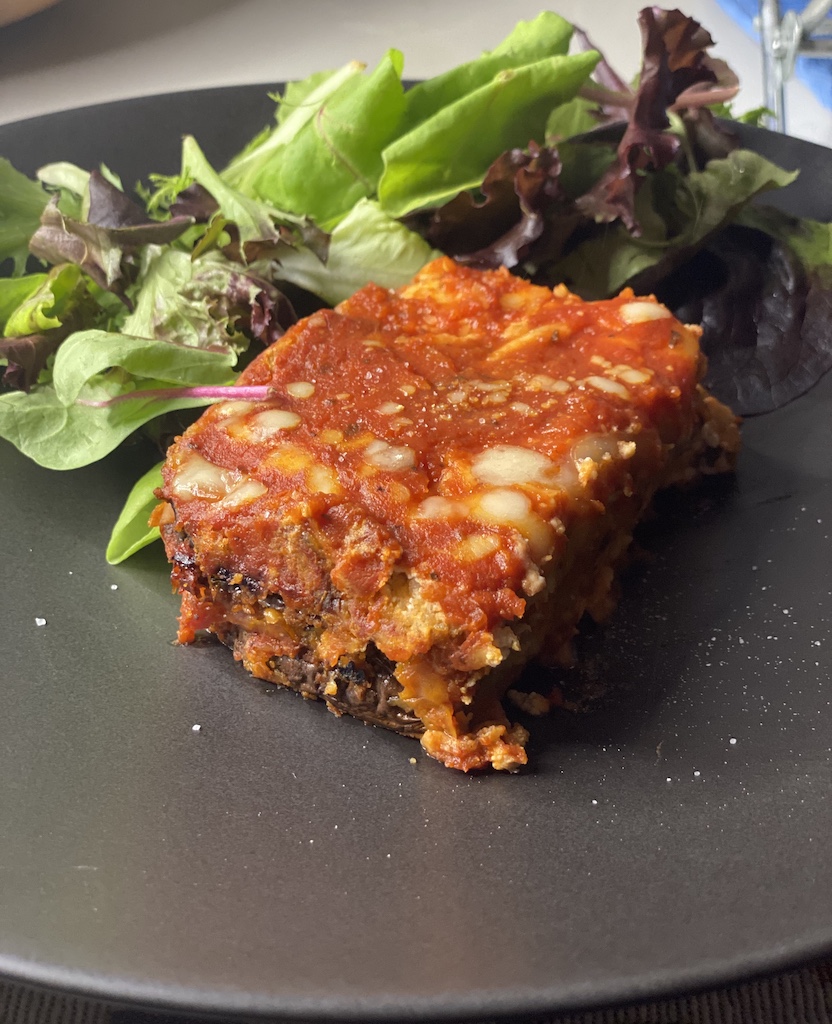
Stuffed eggplant

Are you ready to spoil yourself and your family/friends with a beautiful and delicious new recipe? This is my second eggplant recipe on here and I am so happy how this turned out. In my last eggplant recipe I discussed the nutrition benefits of this vegetable so I encourage you to check that out. This recipe seems so fancy but incredibly easy to make!

I served this as a side with a baked chicken dish but It could also be a fun appetizer or hors-d’oeuvre by cutting the finished product into smaller pieces, putting a toothpick through and serving with some marina sauce on the side for dipping (check out my IG reel). I’ve attached a pdf recipe card and also shared a few tips below.

To start, make sure you have drawn out the water from your eggplant slices or you may end up with a spongy, watery eggplant. Eggplant, like most vegetables, have a higher water concentration and a little sea salt can help draw out the water from the slices. Don’t skip this step.

The breadcrumbs can get soggy after you have breaded one or two portions. To prevent this I only add a little bit of breadcrumbs to my bowl at a time. After done breading one piece I added more fresh breadcrumbs to the bowl. I love this brand, Aleia’s Gluten Free breadcrumbs are extra crispy and perfect for this recipe.

I used an air-fryer for cooking but this could also be done in the oven. Use a baking sheet lined with parchment paper and bake at 375F for 8-10 minutes and then flip over and bake additional 8-10 minutes until golden brown.

I hope you enjoy! If you end up making this recipe and care to share please tag me! @renew_nutrition_consulting


Featured Images-2

Fall Harvest Coconut Curry

Who else is a fan of curry?? I love all curries from yellow to red and enjoy mixing up the ingredients for new recipes. Being that Fall is upon us and more spicy, warm, rich dishes are sounding more appealing I thought what better way to get in the spirit than with some squash and curry together. I think you will love this combination!

If you have visited your local market, or pumpkin patch, I am sure you have seen a plethora of different types of squash. Summer squashes are saying their goodbyes but still available, which is why I choose to add in a yellow zucchini as, well, I kind of felt bad for it; sitting there knowing most people are over zucchini by this time. I honestly have not cooked a lot with pumpkins but I was feeling inspired so I grabbed a small sugar pumpkin and medium butternut squash. That is what I love about cooking, stepping out of your comfort zone and trying new cooking methods, using different fruits and vegetables, different food combinations, and trying out different cultural and regional foods. You definitely do not ever have to be bored with the food you cook.

Did you know that the term curry mean something different for many different regions? A curry is a blend of different spices with many different variations into pastes and powders. Curries can be categorized into either a Thai curry or Indian curry. For this dish I used a yellow curry powder which is seen more in Indian curry and blended in a creamy coconut milk which is mostly seen in Thai curries so we get the best of both with this dish. A yellow curry powder generally contains turmeric (responsible for that orange hue), coriander, and cumin. Other spices you may see in a curry dish could be  mustard seed, lemongrass, ginger, chili, clove, ginger.

So what’s the nutritional benefits of this curry dish? 

With the deep orange colored butternut squash and pumpkin you’ll be taking in some amazing antioxidants in the form of beta-carotene as well as all of the benefits of vitamin A.. Carotenoids, also known as provitamin A, are precursors to vitamin A. Vitamin A is an essential vitamin meaning we need to obtain this from our diet. This fat soluble vitamin is important for our vision, immunity, cellular support and reproduction to name a few. More research is also presenting a link between vitamin A and obesity. Studies are seeing a repeated observation of low vitamin A status in obese individuals causing a more in-depth review of the reasonings behind this. There are several ways beta-carotene and vitamin A have assisted with obesity treatment which includes decreased inflammation, better regulation of carbohydrate metabolism, increasing insulin sensitivity as well as decreasing the creation of new adipocytes (fat cells).

The yellow curry powder with that deep yellowish orange color also provides some great antioxidants. Turmeric with its active compound curcumin have vast amounts of studies on the anti-inflammatory and anti-oxidant benefits.  Some of these benefits include cancer prevention and management of inflammatory conditions such as arthritis and metabolic syndrome.


Now lets get cooking! (if you just want the recipe card click here)

To start:  I encourage you to have everything chopped and prepped before starting the cooking process so it is not so stressful trying to rapidly cut everything up. Pumpkins and butternut squash are a little challenging to peel and chop so give yourself time and be careful. Please do not cut yourself! I definitely recommend investing in a good knife set as well as a quality (sharp) food peeler. Take care of these items by having your knives sharpened periodically and hand-washing.  I used a vegetable peeler making short, fast swipes across the squash and removed as much of the skin as possible. I then chopped up the squash and used a paring knife to remove the rest of the skin.

Once all your veggies are chopped set aside and start heating up the oil in a large pot. Coconut and curry go so well together so I used coconut oil as the start to the dish so all the vegetables immediately start picking up the sweet, nutty aroma. This recipe makes a lot (about 6-8 large servings) and it is cooked all in one pot so definitely make it a larger pot

As with most of my recipes the ingredients can be flexible. You could omit one of the squashes and just do all pumpkin or all butternut squash. Other ideas would be using carrots and/or potato or any color bell pepper, adding mushrooms is also something I was thinking would be delicious.

A note about the Thai chili’s…I love the spice these small, but powerful, chili’s provide but they are a little too hot to bite into. What I did was cut the stems off the chilis and add them to the dish after the coconut milk is added and then removed right before serving. This way they are simmering with all the other ingredients and infuses the perfect spice. Of course if you like that intense heat just leave them in and maybe add more! Conversely if you don’t like a lot of spice you can omit the chili’s all together. The curry will also bring a little spice and deepen the flavor of this dish. Personally more curry the better for me so I used 4 tablespoons for this dish but you can dial it back with just 3 tablespoons per your preference.

You will also notice that I used an apple for this recipe and here is why. The apple adds a touch of natural sweetness that balances out the spices from those chili’s that set’s this dish apart from other curries!

I used beans as my protein for this particular recipe but about 1.5-2# of chicken is also something I’ll do next time. If you are going to use chicken I would dice in to 1″ pieces and stir fry separate. Here’s how:  In a pan over medium-high heat add 2 teaspoons coconut oil and add chicken, season with salt and pepper and cook until no longer pink in the middle (internal temperature should be 165F). Add the chicken to the curry at the same time you are adding your greens.

To serve I had some brown rice cooked and ladled the curry over the warm rice. I served with a few lime wedges and toasted pumpkin seeds. To toast: heat a pan over medium heat (no oil) and add 1/4-1/2 cup of the pepitas and stir or shake pan frequently until you start to smell them cooking and they turn a golden brown, about 3-5 minutes. Like most nuts they can go from raw to burnt very quickly so don’t leave them unattended.

Enjoy this recipe and if you end up making it please tag @renew_nutrition_consulting on IG if you make this dish!

 

a gift of wellness-10

Meet the Brassica Family

Let’s get you well aquatinted to this family. Including cauliflower and other vegetables from the cruciferous/Brassica family is something I try to add in at least a few times per week because of the vast benefits. Cruciferous vegetables contain a powerful pack of naturally occurring phytochemicals known as glucosinolates (a sulfur containing compound that is responsible for the pungent spicy, bitter aroma). Glucosinolates further break down into metabolites that each have a unique set of benefits. Some of the most studied metabolites are isothiocyanates such as sulforphane and indole-3 carbinol which have been found to have anti-cancer, anti-inflammatory, and anti-bacterial properties as well as assisting in phase I and phase II detoxification in the liver. There is also a potential benefit of reducing cardiovascular disease related concerns such as having a heart attack as well as reducing LDL-cholesterol but there are more studies needed here.  I found one study to be really interesting as I am very interested in removing toxins from my lifestyle. This study showed that providing a broccoli sprout rich beverage enhanced urinary excretion of known carcinogens, benzene and acrolein!
These phytochemicals can be found in broccoli and broccoli sprouts, cabbage, bok choy, kale, mustard greens and Brussel sprouts to name a few. In order for glucosinolates to break down into the beneficial metabolites enzymes, myrosinases, are needed. These enzymes are  released when the raw plant is chopped or chewed.  Heat can decrease activity of this enzyme therefore it’s best to not overcook your vegetables. Along with being rich in phytochemicals this class of vegetables is also good sources of fiber, folate, vitamin K, vitamin C and calcium.

Best Cooking Practices to Get the Most Benefits

I recommend eating a combination of raw and lightly cooked vegetables. For example a salad or avocado toast topped with raw broccoli sprouts is a great way to benefit from a super powerful isothiocyanate known as sulforaphane. Check out my IG post on sprouting here

-Never BOIL your veggies

-Lightly steam for less than 5 minutes

-Sauté in a pan with EVOO or avocado oil over medium heat until a fork can just begin to pierce through

-Roast at 425F for 10-15 minutes


Now for the fun part, a new recipe:

If you are a fan of cauliflower you will love this creative recipe. Whenever I have cauliflower I usually lightly steam with some Himalayan salt and pepper but I was feeling bored with that method and come up with this recipe. I have seen before the idea of cauliflower steaks but not anything like this. What I love about recipes like this is the ability to change the ingredients based on what you have available. The sauce, cheese, vegetables can all be substitued.. Maybe you don’t have red sauce but have a pesto or Alfredo available that would also be so delicious. Maybe you’re not a fan of meat products and want to change out the chicken sausages with a protein alternative or want a different cheese, the options are endless. This can definitely be a main course as the fiber from the vegetables will likely keep you full and satisfied.

I hope you enjoy this recipe as much as I did.


Click here for the a pdf recipe card

IMG_3605

Strawberry Rhubarb Jam

Summer is in full swing and I am loving it! One of my favorite parts of this season is the variety of ripe, sweet fruit. A trip along the PCH last weekend after my morning beach walk led me to a local vendor selling some beautiful organic fruit. I couldn’t help but go a little overboard with my purchases. I left with a large flat of berries, mangos, rhubarb, and peaches for under 40$.   As soon as I got home I started mapping out what I wanted to do with all my goodies. I always like to keep frozen fruit available for smoothies so I washed, cut and froze a good portion of the strawberries and peaches. I also cut some and left in the fridge for a quick snack. But the main attraction was my strawberry rhubarb jam!

This jam is very simple with only 4 ingredients and full of flavor. Most jellies and jams will add pectin to thicken however I find that cooking out the moisture produces a perfect thick jam. The sugar draws the moisture out of the berries and rhubarb while the lemon serves as the acid to lower the pH and assists with the “setting” of the jam while also brightening the flavor.

I hope you enjoy this recipe! Strawberry Rhubarb Jam   <————-click here for a pdf recipe card


5DCC8FB1-2ABE-4683-9AAF-B64A72A68F15

Carrot Top Pesto

I always love to try new vegetables so I was surprised that this new vegetable was something I used to so often throw out. This new phenomena of using the carrot tops greens has inspired quite a few new recipes, including this pesto. I have seen a few renditions of this recipe and decided to re-create it myself using my own favorite pesto recipe.

Carrot tops still need a little bit of research on all the benefits but here are some facts we do know about these feathery green leaves.

The leave provide good sources of potassium, calcium, vitamin K, vitamin A , vitamin C, chlorophyll, magnesium, and fiber. So these leaves that are typically tossed in the trash can actually provide heart healthy, immune boosting, digestive aiding, and eye health promoting benefits to just name a few.

The leaves are slightly bitter and closely resemble parsley (looks and taste) and arugula (taste). They are ok to consume raw or cooked and 1 cup contains about 90kcals. 7g carbohydrates and 1g protein.

This pesto recipe is great with pasta, used as a pizza sauce, drizzled on fresh tomatoes, and sandwich/panini spread. I hope you enjoy!


Recipe:

Kitchen tools needed:

*Blender

Ingredients needed:

*1 bunch of fresh carrots, greens sliced off

*1 bunch of fresh basil, leaves removed from stem

*2 cloves garlic

*1/4 cup slivered almonds (pine nuts are also good here)

*1/2 cup grated parmigiana

*1/2 tsp garlic salt

*1/4 cup olive oil


Instructions:

  1. Rinse and pat dry your greens
  2. For the carrot tops remove the leaves by putting one end of the stem between your thumb and index finger and slide up!
  3. Add basil leaves and carrot leaves to the blender
  4. Add the rest of the ingredients to blender
  5. Start blending; to thin the sauce so that it will blend more easily slowly add water. 1/4 – 1/2 cup should do the trick.

Use sauce within 3-5 days or put in sealed, glass bowl to freeze

To unfreeze take out of freezer a day or two before serving or quick defrost by placing in bowl of warm water. Put back in blender to re-mix everything.


Eggplant Parmigiana Lasagna

Recreating two Italian favorites

If you love eggplant you are going to really enjoy this recipe. The first time I ever ate eggplant I was at a popular, chain Italian restaurant and ordered the Eggplant Parmigiana thinking it would be a healthier option that pasta. As I furthered my studies in nutrition and began to realize how unhealthy these seemingly healthy options  were, I have continued to try and re-create the favorites but more lightened up. Don’t get me wrong though I still love going out to eat and when I do, I don’t hold back on ordering what I want (unless it is something that’s going to make me feel ill, like dairy). However I like to be able to enjoy these dishes more often and at home.

Eggplant is a great vegetable to include into your diet (unless you are avoiding nightshades) as it is a good source of fiber, vitamins and minerals (B-vitamins, copper, manganese and vitamin K are most prominent) and also contains a host of phenolic phytochemicals that act as powerful antioxidants. As I discussed in a previous post, antioxidants are responsible for cleaning up free radicals and reducing risk of chronic conditions such as cancer, cognitive decline, and cardiovascular disease. Eggplants, with their rich purple to black color, are an indicator of the type of phytochemical present, anthocyanins (a type of flavonoid also present in blueberries, grapes, plums, prunes, cherries to name a few). There are many different subspecies of eggplant that will alter their shape and size, but all will provide similar benefits just maybe in different amounts. For this recipe I used a classic pear-shaped eggplant also known as black beauty. Look for a firm, dark-colored eggplant that feels heavy for size. Ok now that the chemistry part is out of the way let’s get back to talking about this vegetable and how we are going to make it taste so delicious but not make you feel like you ruined your healthy eating.

We know that eggplant is nutritious but what about when you fry it in butter with breadcrumbs and ladle cheese and sodium-rich sauce on top. Well that vegetable dish is providing you with approximately 720 calories, 50g fat (of which 12g is saturated) and 1980mg sodium for the eggplant alone, no side dishes and likely not doing much to benefit your health. One of the main ingredients that make eggplant parmesan and lasagna so delicious is the creamy, melty mozzarella cheese and the crispy eggplant which is obviously going to rack up the fat and sodium. For this recipe I for sure wanted to delete the dairy as that is one item I don’t digest well. I did want to keep the crispy eggplant as I think it holds up better in a baked dish. By baking instead of frying I reduced the use of extra oil or butter. Luckily there are a lot of vegan options for cheese now and for this recipe I tried a new option, Kite Hill Ricotta Cheese. I also like Violife Grated Mozzarella which I use several of their products regularly. Here’s how I made this dish…

Ingredients/Kitchen Tools

  • 2, 1-1.5lb Eggplants
  • 2 tsp. salt
  • 2 large eggs
  • 2 cups Italian bread crumbs
  • 8oz Kite Hill Ricotta Cheese
  • 2 tsp. Italian Seasoning
  • 24oz Marinara sauce
  • 1.5 cups Violife Mozzarella Cheese, or mozarella cheese of choice
  • 1/4 cup basil, chopped
  • Large baking sheet
  • Parchment paper
  • 8×8 baking pan

Since eggplants are spongy, they tend to soak excess liquid/oil so to prevent this I “sweated” the eggplants. Start by slicing into ½” slices  and place them on a baking sheet lined with a tea towel. Lightly salt both sides and let sit for at least 30 minutes. Blot both sides of eggplant slices with clean paper towels to get the rest of the liquid and salt off of the eggplant.


Pre-heat oven to 375F and line a large baking sheet with parchment paper.


Beat 2 eggs with 2 tablespoons of water in a medium bowl and in another shallow bowl add 1 cup of bread crumbs. Dip slice of eggplant into egg wash and then coat both sides with breadcrumbs. Repeat process for all eggplant slices and bake for 10 minutes on a baking sheet lined with parchment paper. Flip slices over and bake again for 10-12 minutes until golden brown

While eggplant is baking prepare the ricotta mixture by stirring in 2 tsp of Italian seasoning into ricotta.

In a 8×8 baking pan spread 1 cup of marinara sauce on the bottom. Start building the lasagna by placing a layer of eggplant. I chose not to have any gaps in my eggplant layers so I cut pieces of eggplant to fill in all the gaps. On top of the eggplant spread ½ of the ricotta mixture followed by ½ cup of marinara sauce and ½ cup of mozzarella. Repeat process with eggplant slices (filling in holes with cut up pieces of eggplant), ricotta, marinara and cheese. Top last layer with remaining marinara and mozzarella cheese. You will likely have left over pieces of eggplant which can be saved for other meals/snacks (eggplant pizzas).

Cover your pan with foil and bake for 25 minutes. Remove foil and bake additional 5 minutes. Let cool and top with chopped basil. Enjoy 🙂 

I have attached a pdf recipe card to save for easy viewing later on. Let me know what you thought of this recipe and any changes you made. 

Homemade Creamy Almond Butter

Hello friends! I hope this blog finds you healthy and in good spirits! (and if not reach out to me and lets see if some nutrition therapy can improve your health). I just got back from a much-needed trip to the desert for some breaks from city life and to clear my head. What a treat it was to be in nature, exploring such an amazing landscape. I highly encourage a trip to Joshua Tree, the town/area is so eclectic, spiritual, and beautiful in its own way. Being a southern Oregon native where we are spoiled with streams, lakes, mountains, and tall trees the desert is most definitely very different from what I am used to but the Joshua Tree beauty is extremely unique (I shared some pictures below).We finished out our weekend soaking in tub in the middle of nowhere! Visiting Wonder Valley Hot Springs made our trip beyond amazing. Words can’t describe how perfect it was to watch the sunrise from a private tub filled with geothermal heated mineral water with my partner! Now back to the food 🙂 


 I wanted to share one of my favorite snack/meals to bring on my outdoor adventures. Nutritious, easy to make, and calorie dense are some of the qualities that I look for in my snacks so that I can keep energized on my adventures. I am not going to teach you how to make a PB & J in this post however I am going to teach you my trick to getting that perfect sandwich with my favorite homemade almond butter.


Any nut butter will provide you with healthy fats and protein but I prefer almond butter as my stomach does not seem to like peanuts or cashews in large quantities. If you have bought almond butter before it can be pretty pricey, up to 12$ for 12oz which is just crazy. Instead I like to make my own almond butter and now prefer mine over store bought. I would say the trick to get a smooth, flavorful butter is to dry roast your almonds before blending. I’ll detail below….

Ingredients/Kitchen tools

  • 1# organic almonds
  • 1 tsp sea salt
  • Sheet pan
  • High-powered blender or food processor

To start layer your almonds an un-greased baking sheet, sprinkle sea salt on top and place in a pre-heated oven at 425F. 

Roast for 5 minutes. Take the pan out and shake or turn your almonds over to prevent burning. Return to oven and roast additional 3-5 minutes. Stay vigilant during the roasting process, burned almonds don’t taste very good! If you start to smell them they are done. They should be slightly browned but not dark. 

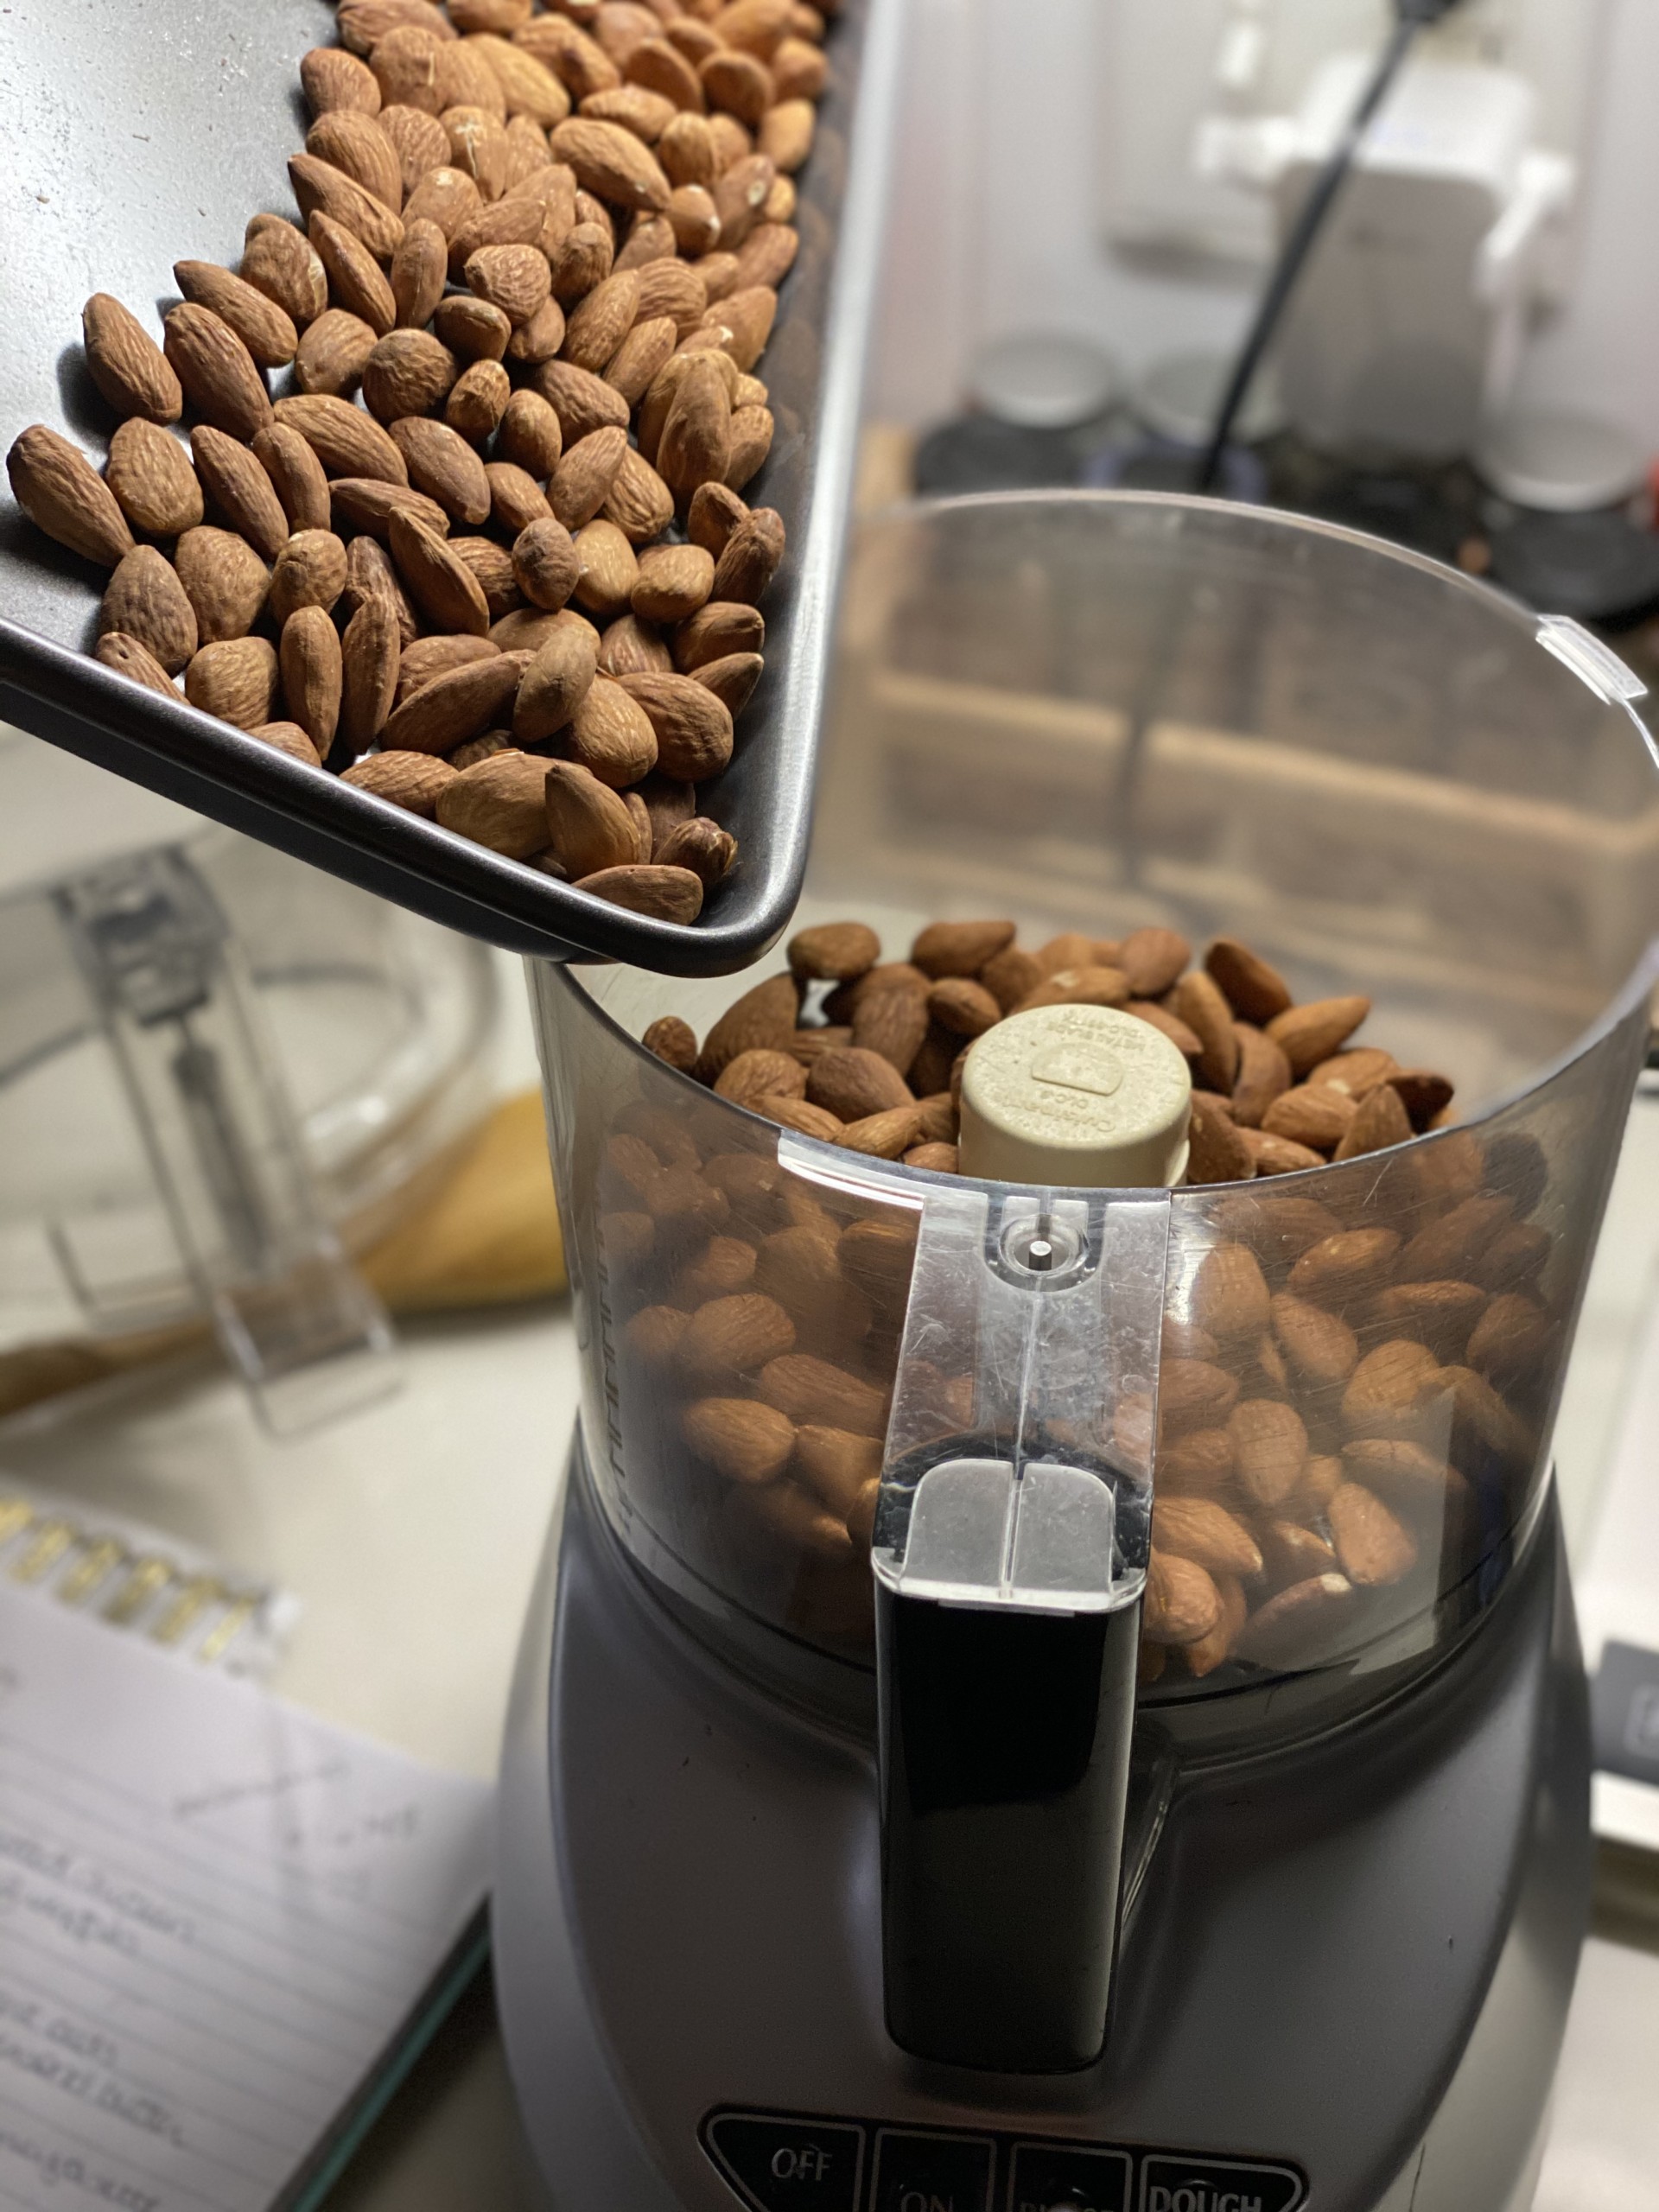
Once all roasted place them in your food processor or high-powered blender

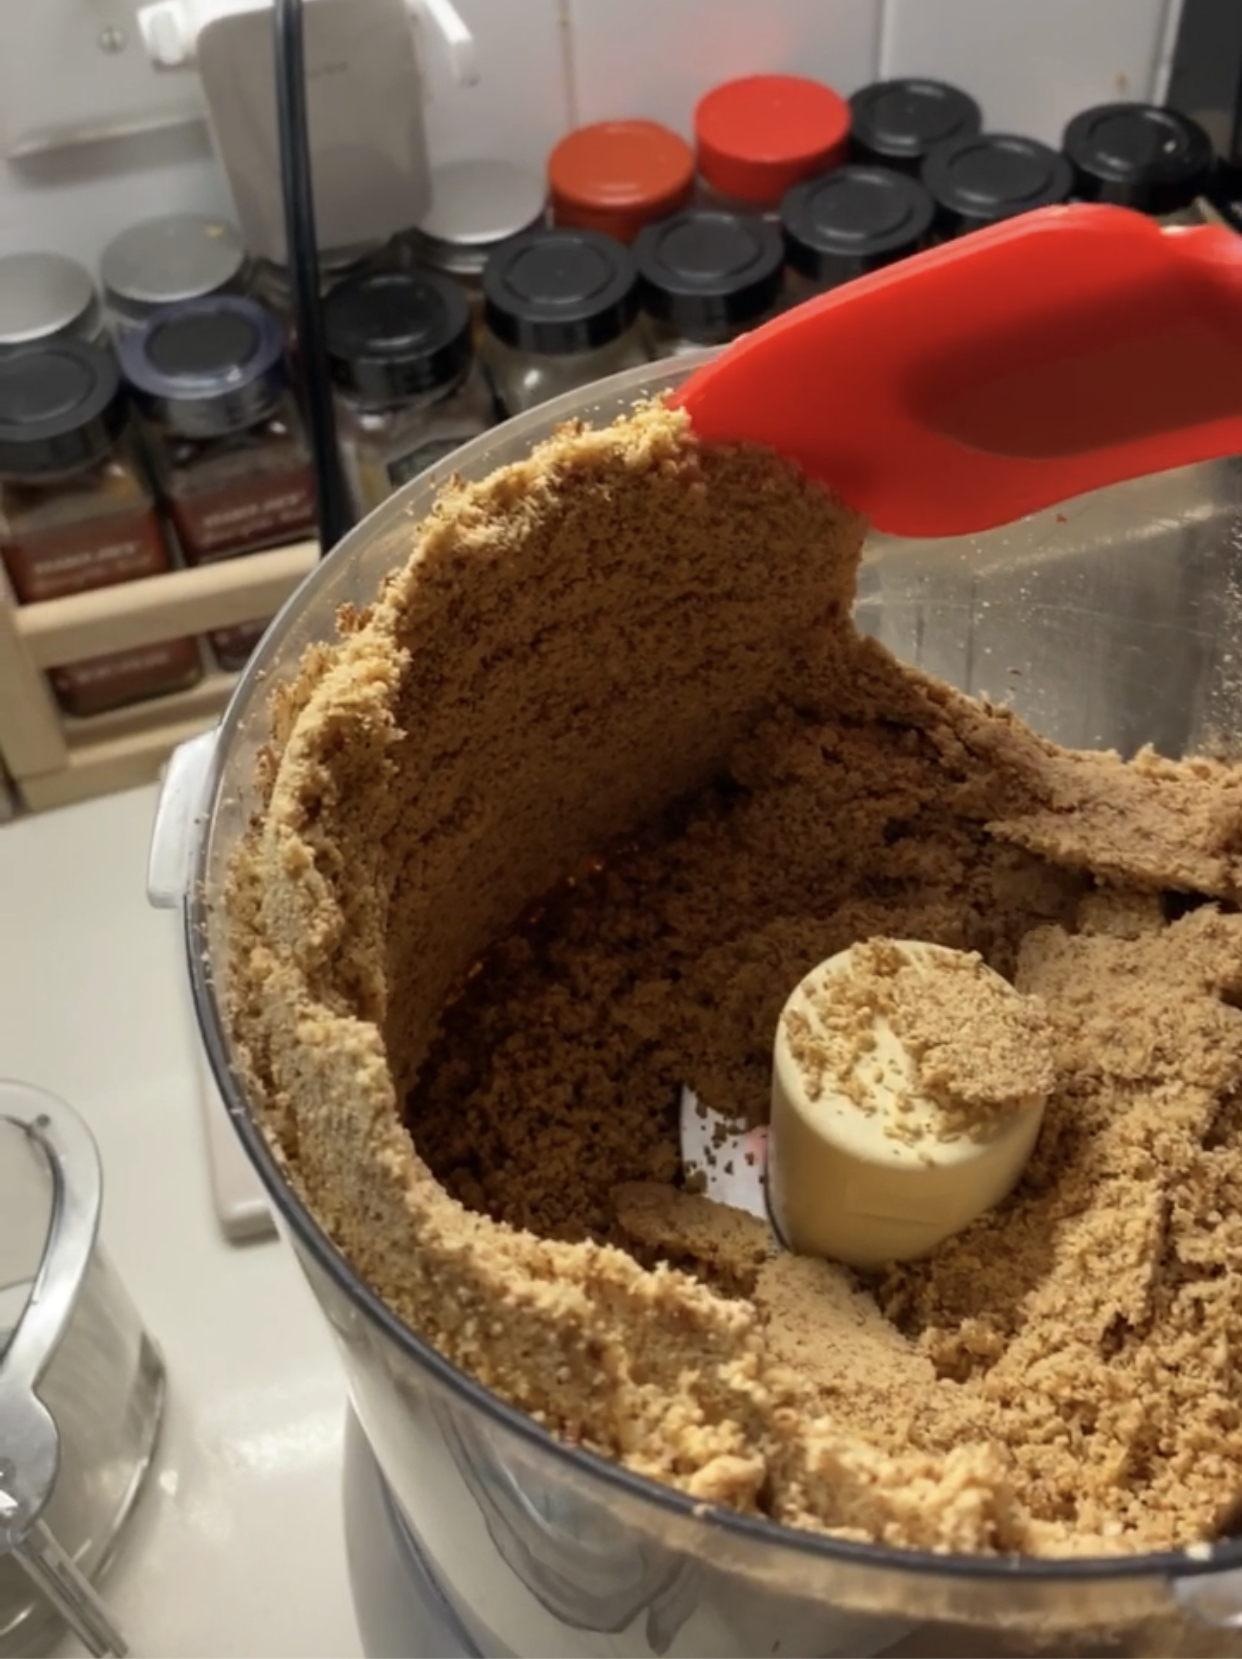
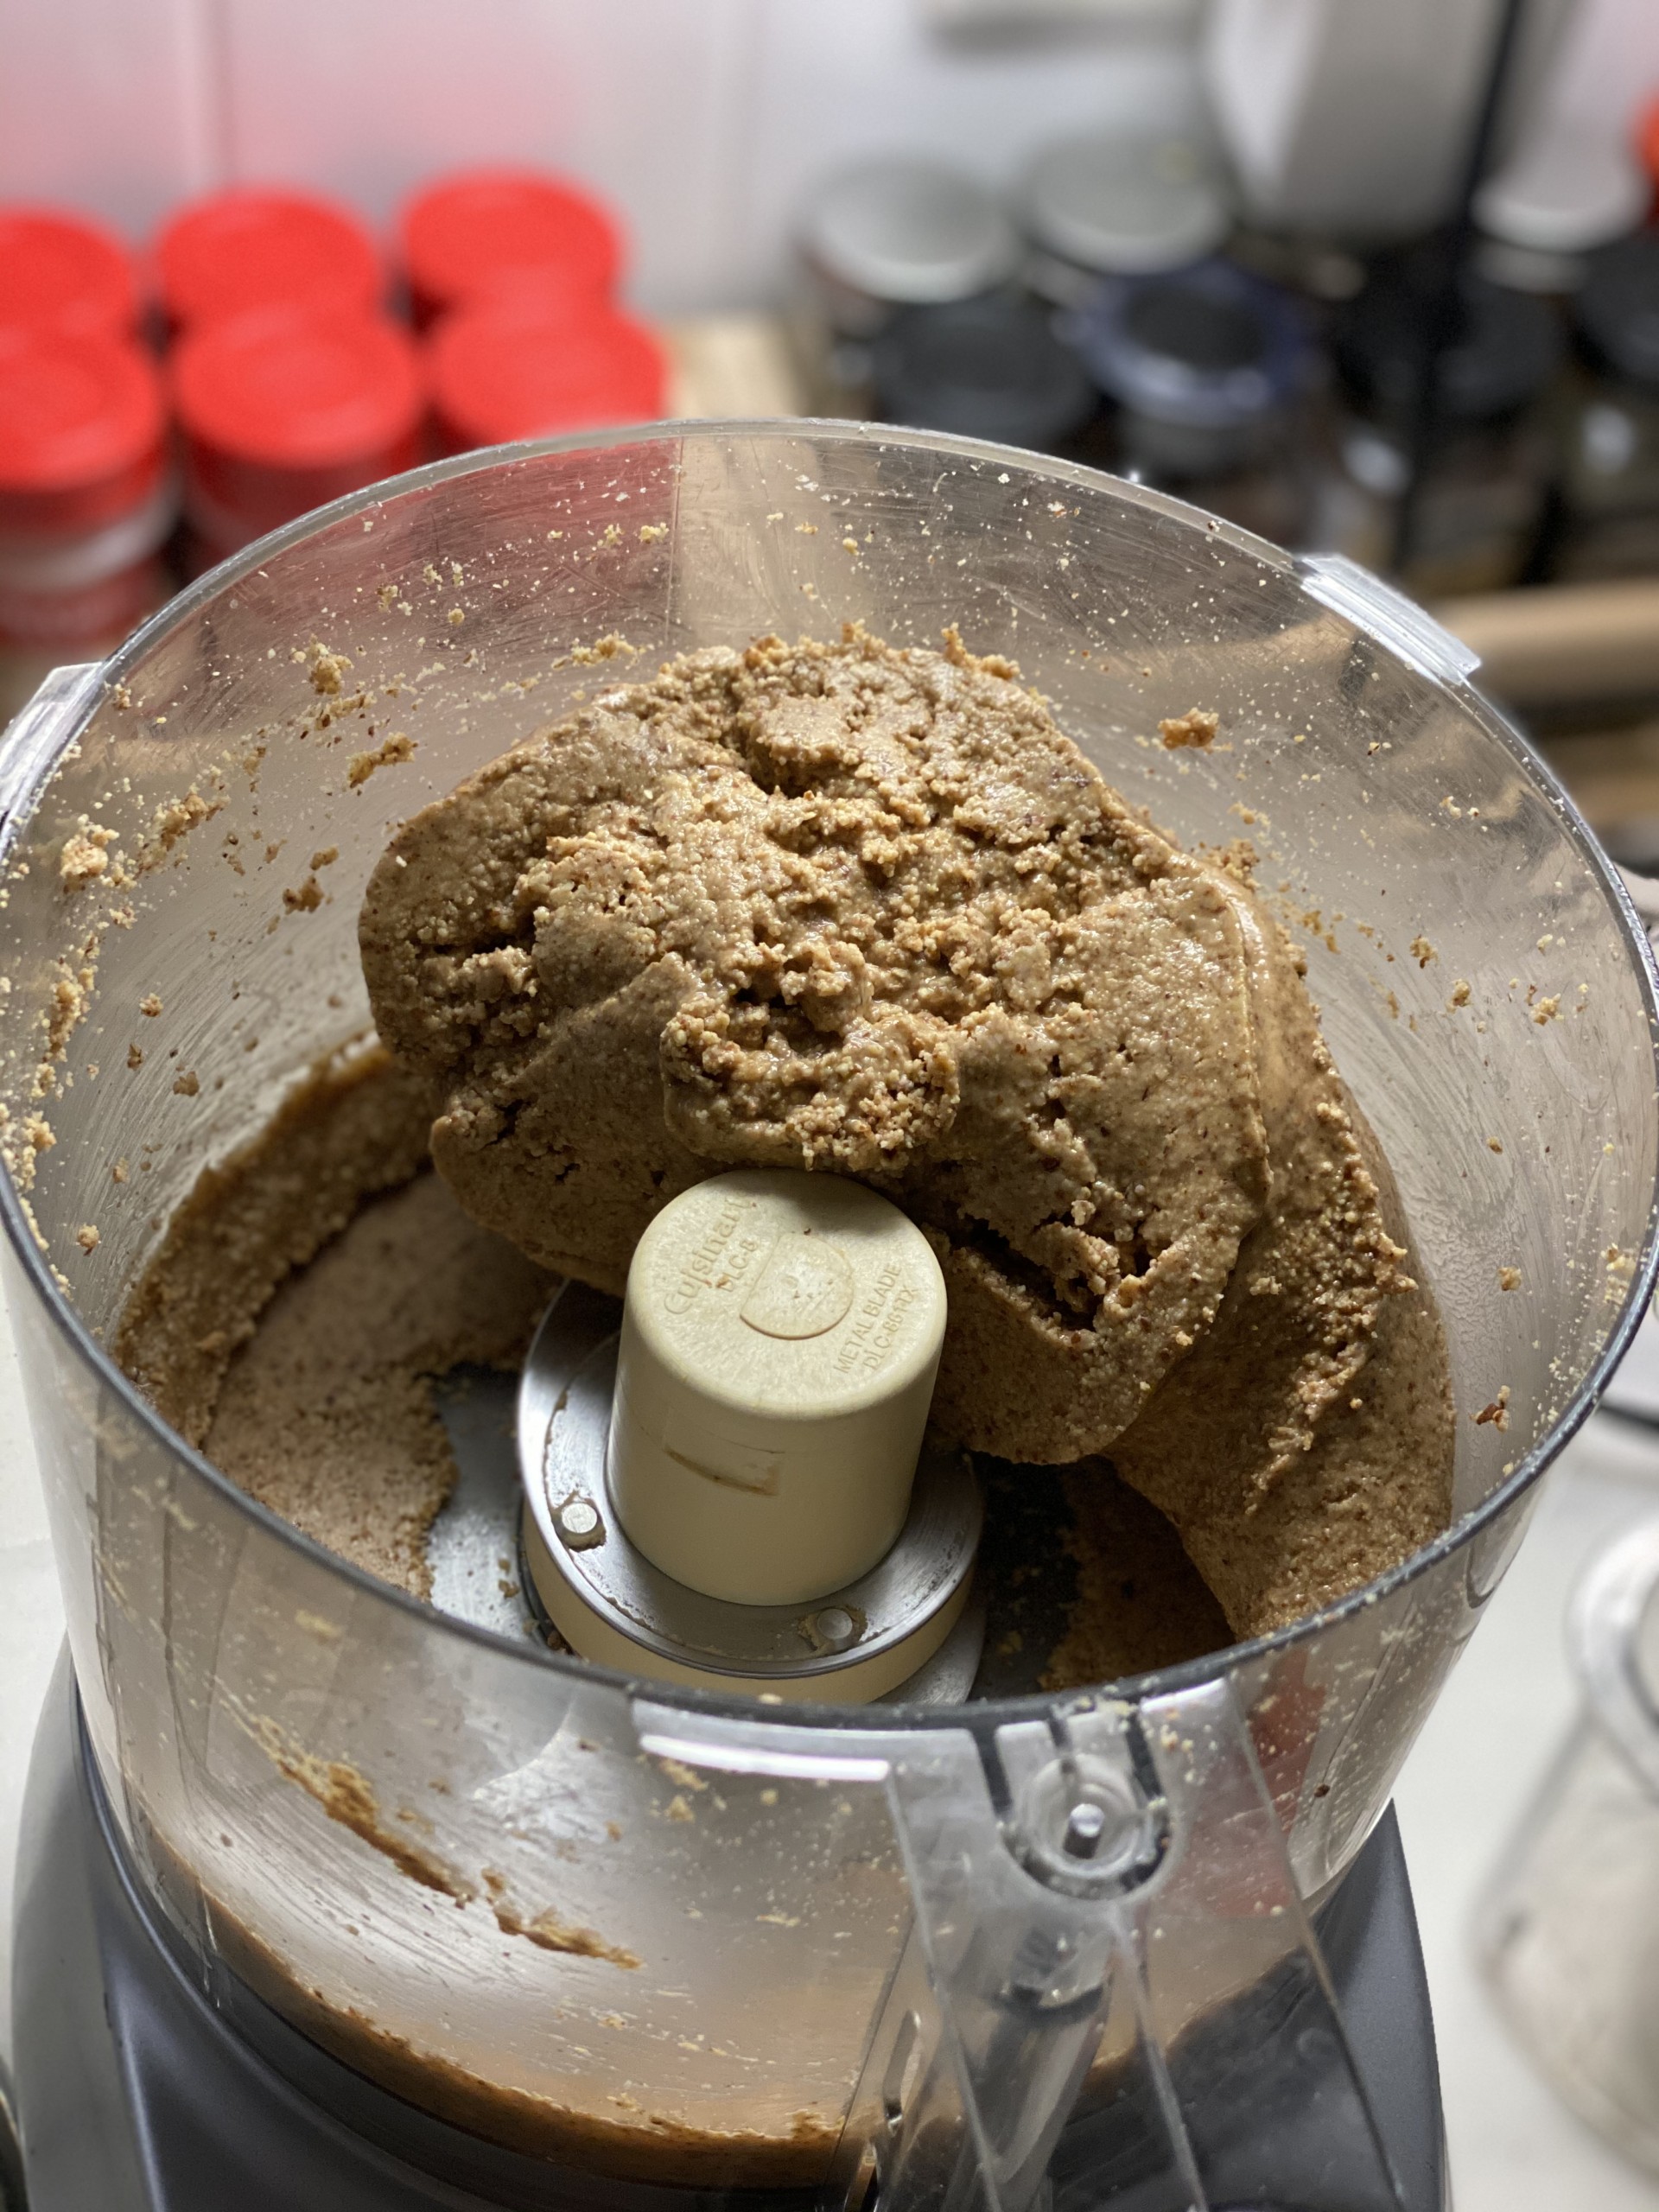
Turn your machine on high and blend until the almonds start sticking to the side of the machine


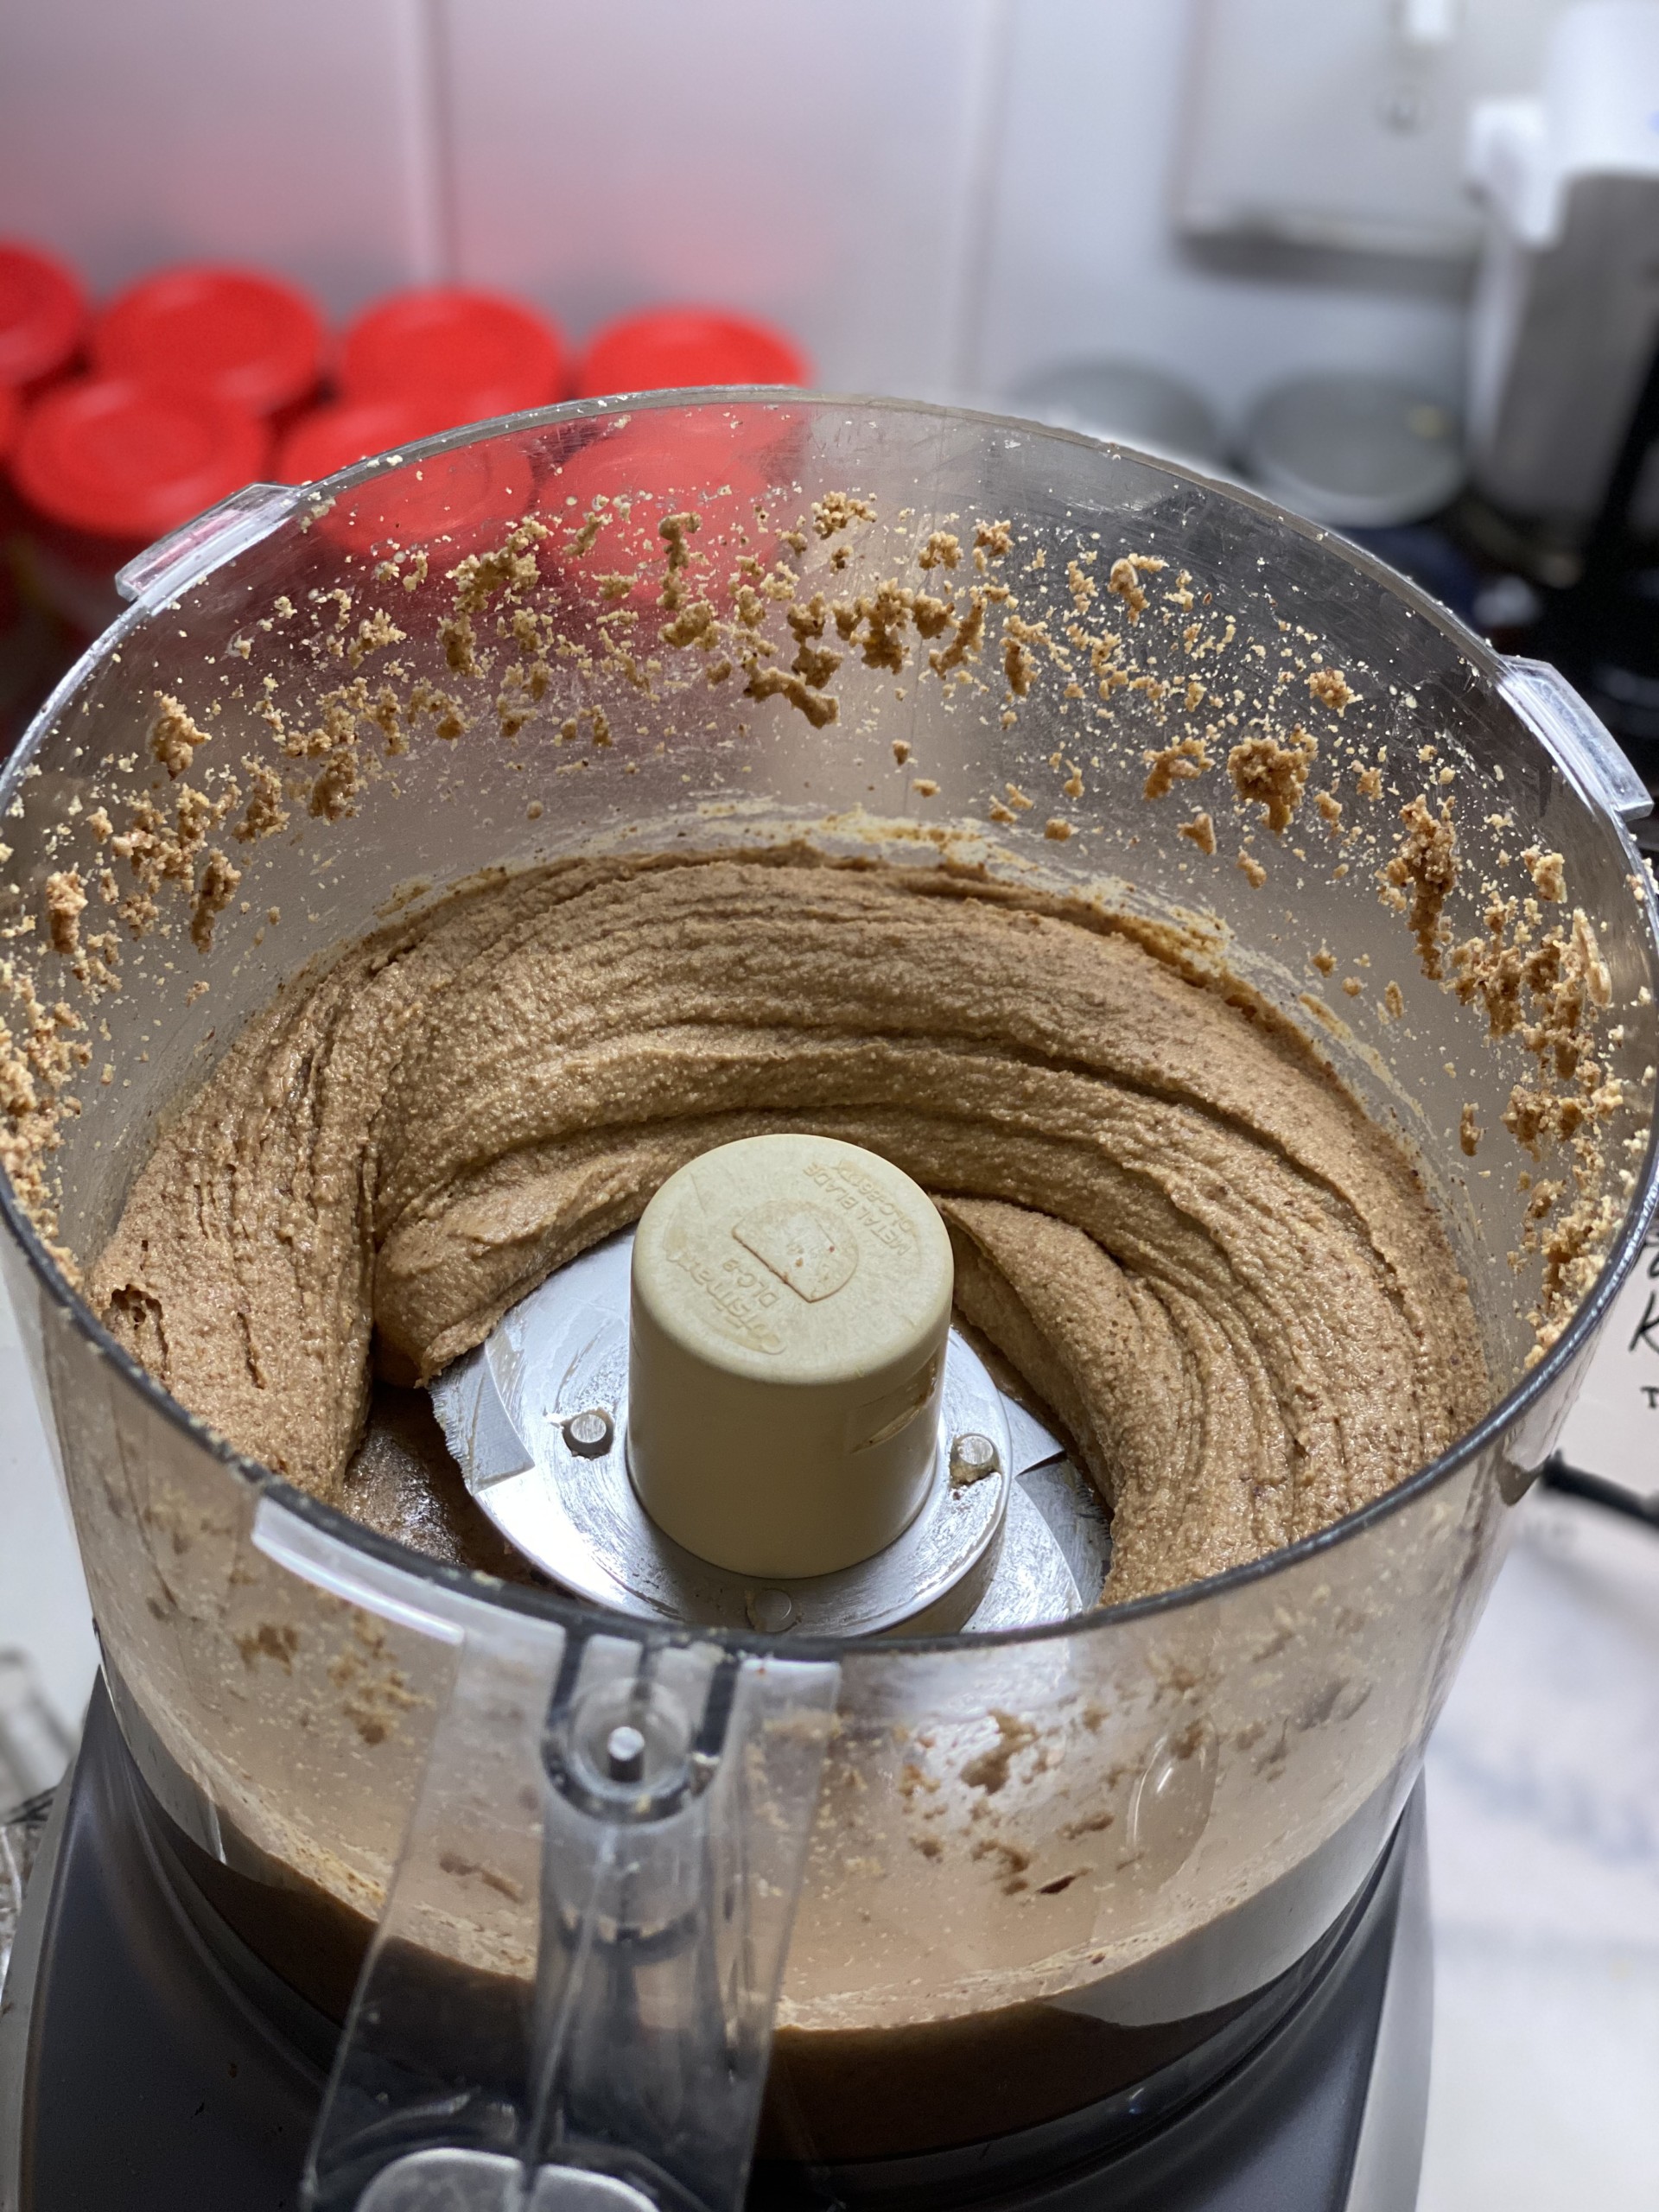
Once the almonds pass the powdery phase they will start to look almost wet and stick to the sides. This is the time to turn off your machine and scrape down the sides back in to the blade. You will likely need to repeat this process 3-5 times. 

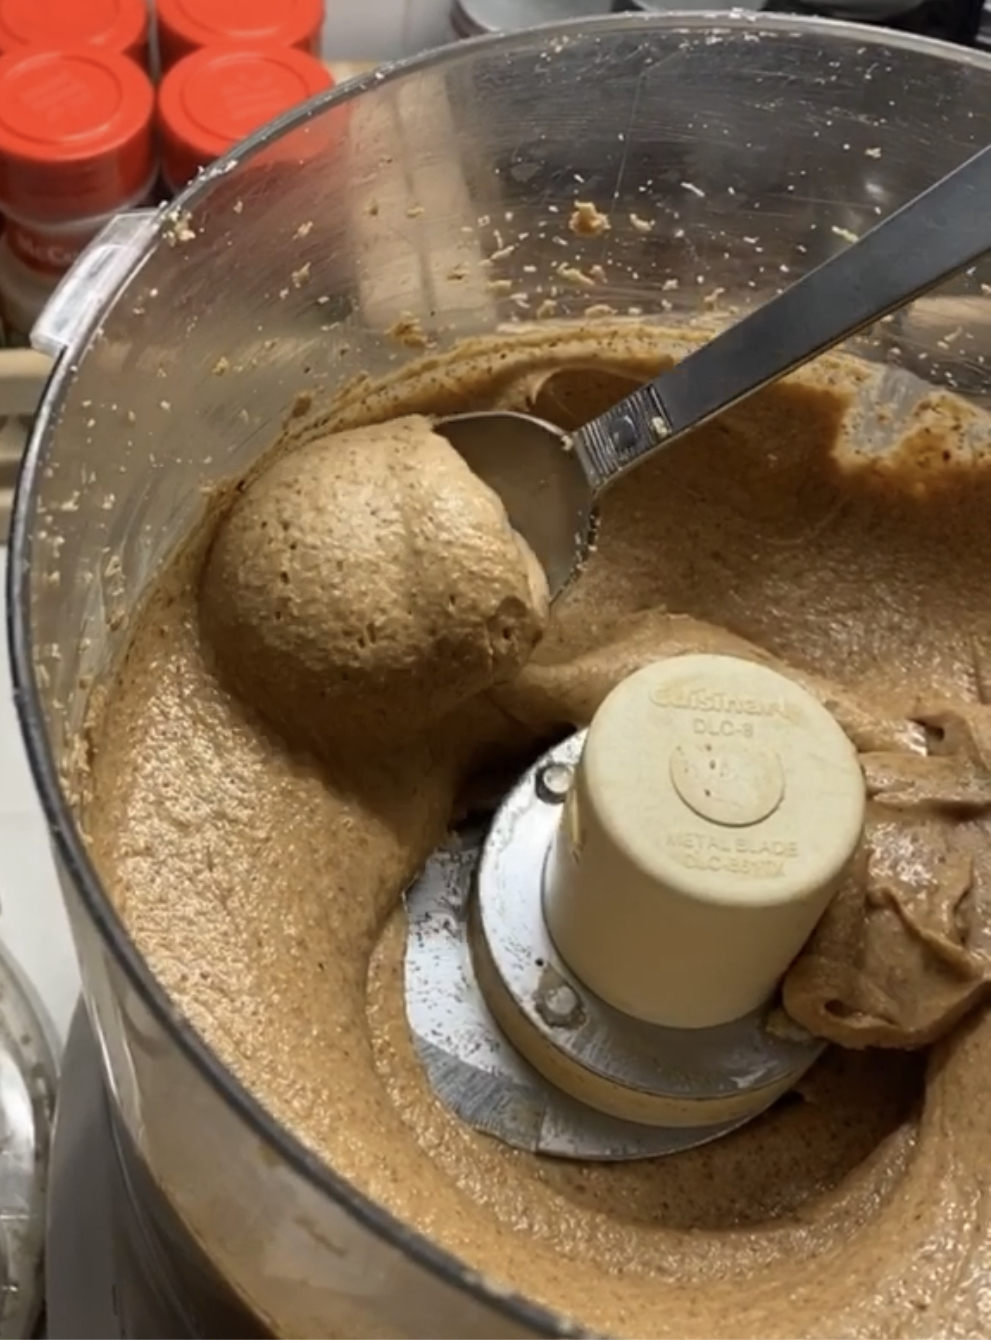
Eventually your almonds will be almost to the perfect creamy state but don’t be alarmed if they start to ball up as shown. Use a spoon to break apart into smaller pieces and continue blending. 

Once your almonds reach butter state, scrape the sides of the bowl down into the butter and blend one final time


Your almond butter should be well blended, creamy and ready to enjoy however you like. I like it as is but sometimes I will add some sweetener for a little treat. I have tried honey, agave, and maple syrup which were all great. 

I want to emphasize that if you are using a sweetener STIR it in at the end of blending rather than blending it in. If you blend it the viscosity of the butter may change creating a watery texture. 

Plant Power Enchiladas

I am a huge fan of Taco Tuesday and have a lot of fun coming up with new ways to incorporate something different for this day of the week. Also while I am not a 100% plant-based I do try to incorporate at least 2-3 meals a week being plant based which is where the concept of these enchiladas came from. 

The flavors are spicy, rich and smokey and an overall hearty dish. I used a simmer sauce I found at Von’s but any red enchilada sauce will work or you could omit as well but may have a bit more dry of a filling. The cheese I used is dairy free but feel free to use any “cheese” of your choice. I found this meal to be filling without any side dishes but a simple green salad with olive oil and a squeeze of lime would be a perfect side. Comment below if you made and how you liked it!

Serving size is 2 tortillas which will provide ~515 calories, 20g protein, 70g carbohydrates and 17g fat

Click here for the recipe in PDF format


2nd blog

Renew Your Health Shots

2020-07-23

During these times I am finding it more important than ever to take special care of my body so my immunity is in tip top shape. There is no better time than now to start building up our immune systems. There are a lot of ways to do this; getting more sleep, eating fruits and vegetables that provide an array of micronutrients and vitamins,  and nourishing the body with stress-reducing activities. This recipe is a great way of ingesting some really powerful ingredients in a shot form; the healthy kind.

We have all seen the little juice shots in the stores that offer a wide array of benefits to our bodies. These are concentrated blends of mostly fruits and vegetables that are aimed at improving our bodies defense  system.  While I still enjoy purchasing these from time to time it’s also nice to know I can create them from home and customize them to whatever my body is needing.

Vitamin C, which is a powerful antioxidant, is the star of these little drinks. Antioxidants are substances that protect against cell damage. So what does cell damage actually mean? Throughout our daily lives things such as environmental toxins, smoke, pollution, etc as well as natural processes within our body to break down food into usable energy and exercise can create unstable molecules known as free radicals. While our bodies all at one time or another have free radicals it is the imbalance of more free radicals than stable molecules that tips the equilibrium to a more damaging state within our body known as oxidative stress. Having oxidative stress build up is damaging to our cells and in turn can be linked to cancer, Alzheimer’s, cardiovascular disease and decreased immunity. To help combat these free radicals we can  consume a diet rich in fruits and vegetables chalked full of natural antioxidants. These shots are a great way to get in some of these vitamin C rich fruits.

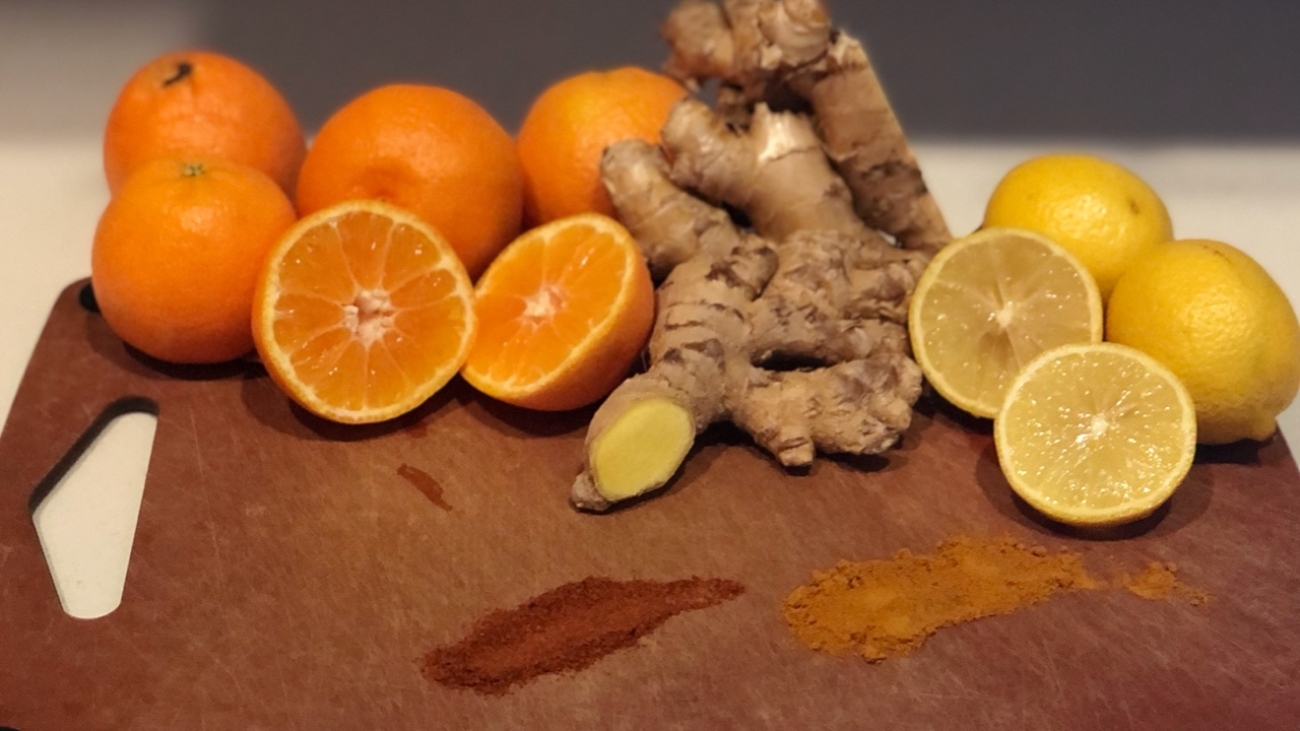
The ingredients can be interchanged  depending on what your body is needing but the recipe I was needing today contains  coconut water, orange, lemon, ginger, turmeric, cayenne pepper, and black pepper

  • Coconut water: provides electrolytes and hydrating fluids
  • Orange and lemon juice: high in vitamin C
  • Ginger: strong antiviral and anti-inflammatory properties and can help alleviate nausea, settle the stomach and reduce common symptoms of viral illnesses
  • Turmeric: part of the ginger family and a common spice; curcumin is a major component of turmeric and gives turmeric that yellow color and provides anti-inflammatory and antioxidant properties.
  • Cayenne: contains vitamin C and other antioxidant properties. More definitive research is still in process however there is promising data that cayenne may improve/increase metabolism and improve heart function
  • Black pepper: includes the spice piperine which helps improves the bioavailability of curcumin (improves how well your body absorbs the nutrient)

Ingredients:

½ pound ginger root (peeled if not using a juicer) or about 4oz ginger juice

4 small lemons or about 4oz lemon juice

6 small to medium oranges or about 8oz orange juice

1 tsp turmeric powder

¼ tsp cayenne pepper

Few crack of black pepper

8oz coconut water

Directions

  1. Using a high power juicer, extract the juice from the ginger root, lemons, and oranges.

If you don’t have a juicer there are options!

  • Feel free to use store bought organic orange, lemon and ginger juices just make sure there is no added sugar to the juices; you want 100% pure juice.

Or

  • Blend together your peeled oranges, lemons and ginger root in a high-power blender and strain the pulp using a fine-mesh strainer or cheesecloth
  1. Once you have your juice add to a blender along with the turmeric, cayenne and cracks of black pepper and coconut water. Blend for at least 30 seconds
  2. Taste test! Per your preference you can add more heat (cayenne), or if it’s too acidic or strong for your liking you can add filtered water or more coconut water.
  3. Store in air-tight bottles or mason jar for up to 1 week

Nutritional Content

Serving size: 2oz

-Provides 15 calories, 3g carbohydrates , 0g protein

Tips and tricks!

*If you ever purchased those store-bought shots save the bottles, wash and re-use them for your homemade shots. Also they are good for taking dressings on the go!

*Before washing out your blender and/or juice machine collection apparatus fill with fresh, filtered water, swish around and pour into a water pitcher for some refreshing water. Some of the ingredients get stuck on the inside and you don’t want to waste these precious ingredients.

*Get creative, if you don’t like much heat scale back on the cayenne and/or ginger, if you want it to be a little more “earthy” add more turmeric. If you aren’t a fan of coconut water, filtered water or omitting completely is fine. You can add other ingredients such as apple cider vinegar.


Cautionary:

*Ingredients have a bit higher acid content and may cause GI upset and/or heartburn. I would recommend consuming with a meal.

*Recipe is higher in potassium, if you have been instructed to monitor your intakes of potassium (i.e kidney disease) than consider other food and drinks that contain higher potassium and reduce

*Turmeric stains! Wipe up and rinse out promptly from counters and clothes


Momtazi-Borojeni AA, Haftcheshmeh SM, Esmaeili SA, Johnston TP, Abdollahi E, Sahebkar A. Curcumin: A natural modulator of immune cells in systemic lupus erythematosus. Autoimmun Rev. 2018;17(2):125-135. doi:10.1016/j.autrev.2017.11.016

Panchal SK, Bliss E, Brown L. Capsaicin in Metabolic Syndrome. Nutrients. 2018;10(5):630. Published 2018 May 17. doi:10.3390/nu10050630